Scalable AI LLM RAG Pipeline: Async Document Processing with LangChain, NestJS, BullMQ, and Qdrant - Andy Primawan
Learn how to build a robust, scalable pipeline for vectorizing PDFs, DOCX, and TXT files asynchronously. We'll use S3, NestJS, BullMQ, LangChain, OpenAI, and Qdrant to create a resilient ingestion system for your next AI LLM RAG application.
Introduction
In the world of AI and Large Language Models (LLMs), Retrieval-Augmented Generation (RAG) is a game-changer. It allows us to ground LLMs in our own private data, providing contextually aware and accurate responses. But before we can retrieve anything, we have to solve a fundamental problem: how do we efficiently and reliably process user-uploaded documents (like PDFs, DOCX files, etc.), turn them into vectors, and store them in a vector database?
Doing this synchronously during an HTTP request is a recipe for disaster. It's slow, error-prone, and doesn't scale. Today, I'm going to walk you through a production-ready, asynchronous architecture I've been working on, using a powerful stack: NestJS, BullMQ, Amazon S3, OpenAI, and Qdrant.
The Problem Statement
Imagine a user uploads a 50MB, 200-page PDF to your web application. A simple REST API endpoint that tries to handle this synchronously will face several issues:
- Request Timeouts: Processing a large document, splitting it, and making hundreds of API calls to an embedding service can take minutes, far exceeding typical HTTP request timeouts.
- Server Bandwidth Consumption: Forcing large files to be uploaded through your backend server consumes significant bandwidth and processing power, starving other requests.
- API Rate Limits: If 10 users upload documents at once, you might make thousands of calls to the OpenAI API in a short burst, triggering rate limit errors.
- Lack of Resilience: If the OpenAI API has a hiccup or your vector database is momentarily unavailable during the process, the entire operation fails. Retrying a failed multi-minute process is a poor user experience.
The Solution: An Asynchronous, Queue-Based Architecture
To solve these problems, we decouple the process. We accept the file upload acknowledgment and immediately hand off the heavy lifting to a background worker. This makes our system scalable, resilient, and efficient.
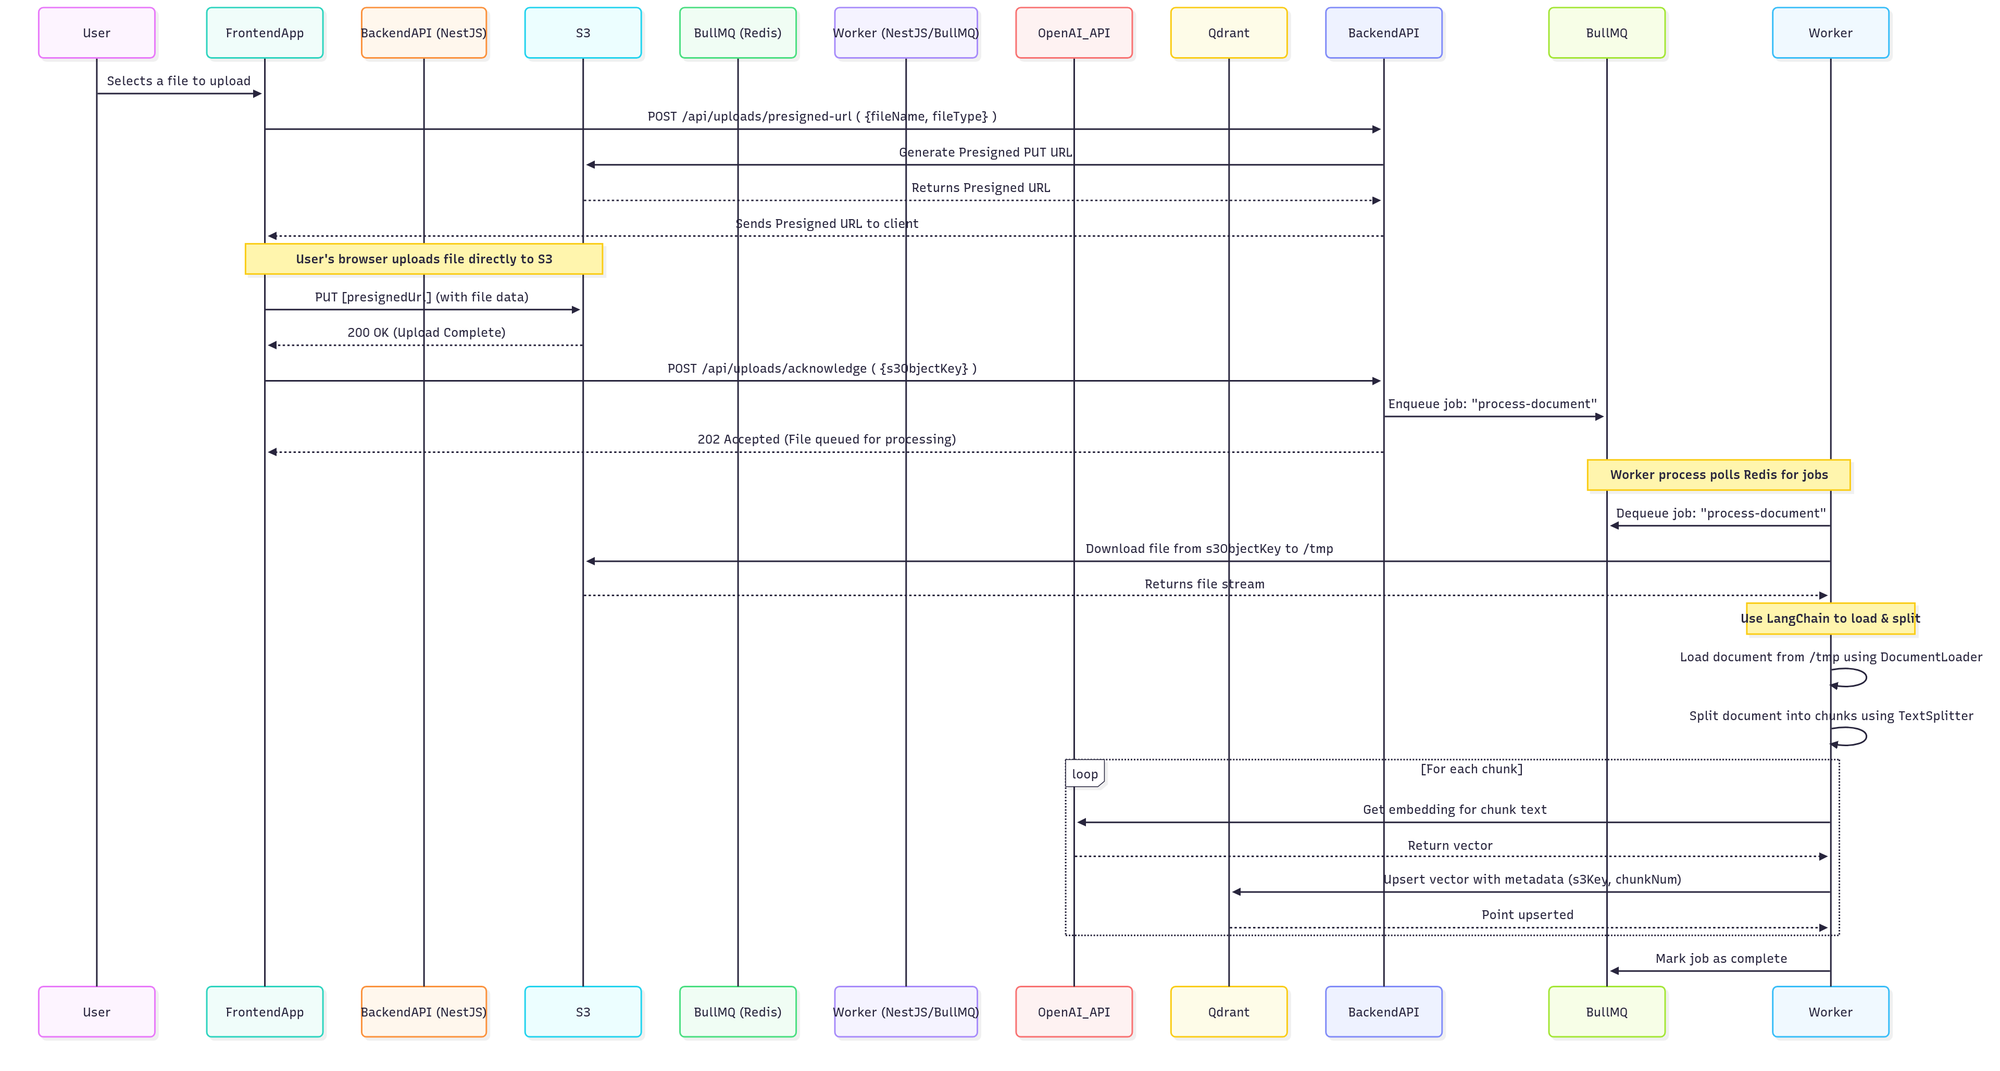
Here is a step-by-step look at the entire flow.
System Architecture Diagram
You can use a tool like Mermaid.js to render this diagram from the following syntax:
sequenceDiagram
    participant User
    participant FrontendApp
    participant BackendAPI (NestJS)
    participant S3
    participant BullMQ (Redis)
    participant Worker (NestJS/BullMQ)
    participant OpenAI_API
    participant Qdrant

    User->>FrontendApp: Selects a file to upload
    FrontendApp->>BackendAPI: POST /api/uploads/presigned-url ( {fileName, fileType} )
    BackendAPI->>S3: Generate Presigned PUT URL
    S3-->>BackendAPI: Returns Presigned URL
    BackendAPI-->>FrontendApp: Sends Presigned URL to client

    Note over FrontendApp, S3: User's browser uploads file directly to S3
    FrontendApp->>S3: PUT [presignedUrl] (with file data)
    S3-->>FrontendApp: 200 OK (Upload Complete)

    FrontendApp->>BackendAPI: POST /api/uploads/acknowledge ( {s3ObjectKey} )
    BackendAPI->>BullMQ: Enqueue job: "process-document"
    BackendAPI-->>FrontendApp: 202 Accepted (File queued for processing)

    Note over Worker, BullMQ: Worker process polls Redis for jobs
    Worker->>BullMQ: Dequeue job: "process-document"
    Worker->>S3: Download file from s3ObjectKey to /tmp
    S3-->>Worker: Returns file stream

    Note over Worker: Use LangChain to load & split
    Worker->>Worker: Load document from /tmp using DocumentLoader
    Worker->>Worker: Split document into chunks using TextSplitter

    loop For each chunk
        Worker->>OpenAI_API: Get embedding for chunk text
        OpenAI_API-->>Worker: Return vector
        Worker->>Qdrant: Upsert vector with metadata (s3Key, chunkNum)
        Qdrant-->>Worker: Point upserted
    end

    Worker->>BullMQ: Mark job as complete
The PNG version of the diagram:
Step 1: The Upload (S3 Presigned URLs)
The user never uploads the file to our Node.js server. Instead, the frontend asks our backend for a special, one-time-use S3 Presigned URL. This URL grants temporary permission to upload a specific file directly to our S3 bucket.
This is brilliant because the multi-megabyte file transfer happens between the user's browser and Amazon's highly scalable infrastructure, completely bypassing our server's bandwidth.
Step 2: Acknowledgment and Queuing (BullMQ)
Once the direct upload to S3 is complete, the frontend makes a second, lightweight API call to our backend. This call simply says, "Hey, the file is ready at this s3ObjectKey."
Our NestJS controller's only job is to take that s3ObjectKey and create a job in a message queue. We're using BullMQ, a fantastic Redis-based queue system for Node.js. It's robust and gives us fine-grained control over our jobs.
// In your NestJS service
import { InjectQueue } from '@nestjs/bullmq';
import { Queue } from 'bullmq';

// ...
constructor(@InjectQueue('knowledge-files/vectorize') private vectorizeQueue: Queue) {}

public async queueDocumentProcessing(s3ObjectKey: string, originalName: string) {
  // Add job to vectorization queue
  await this.vectorizeQueue.add(
    'vectorize-file',
    {
      knowledgeFileId: updatedKnowledgeFile.id,
      storageKey: updatedKnowledgeFile.fileUrl, // fileUrl contains the storage key
    },
    {
      attempts: 3,
      backoff: {
        type: 'exponential',
        delay: 5000,
      },
    },
  );
}
Step 3: The Worker Awakens (BullMQ Consumer)
This is where the magic happens. We run a separate NestJS process (or the same one, configured for hybrid mode) that acts as a BullMQ Consumer. This worker constantly listens for new jobs in the document-processing queue.
When it picks up a process-document job, it gets the s3ObjectKey and begins the real work.
// In your worker/processor file
import { Processor, WorkerHost, OnWorkerEvent } from '@nestjs/bullmq';
import { Job } from 'bullmq';
interface VectorizeJobData {
knowledgeFileId: string;
storageKey: string;
}
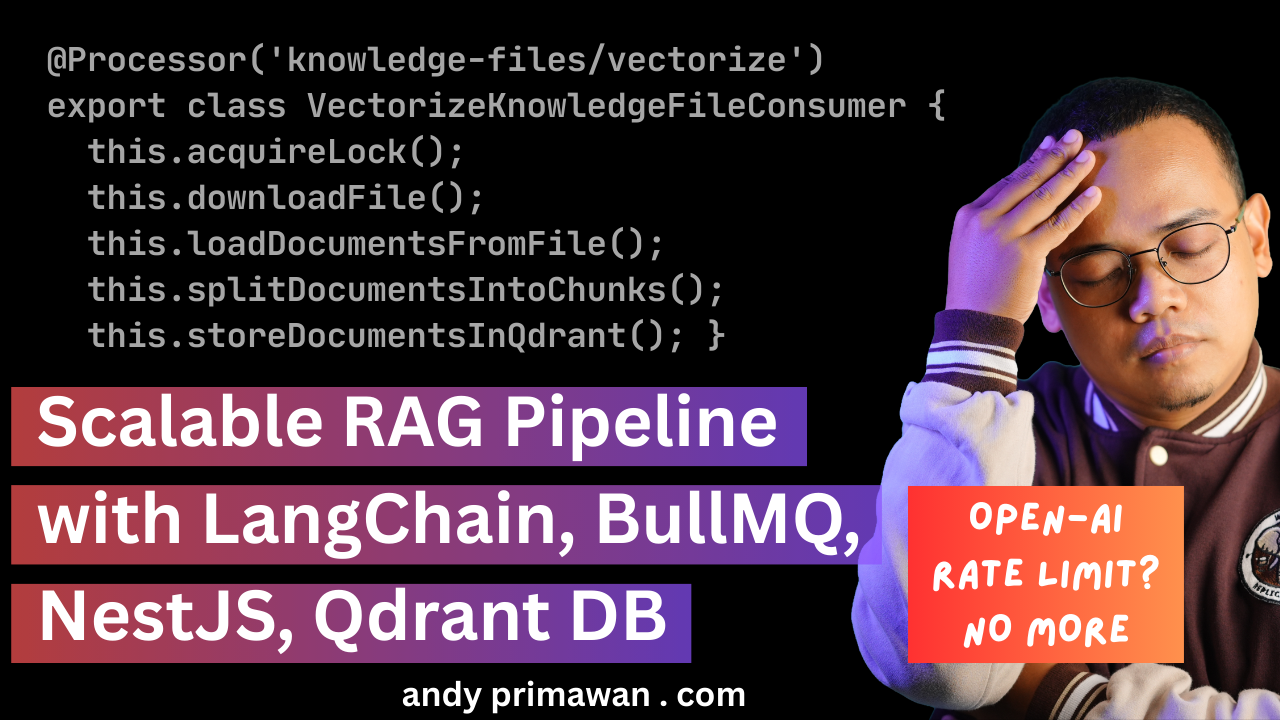
@Processor('knowledge-files/vectorize')
export class VectorizeKnowledgeFileConsumer extends WorkerHost {
async process(job: Job<VectorizeJobData>): Promise<void> {
const { knowledgeFileId, storageKey } = job.data;
this.logger.log(`Processing document: ${knowledgeFileId}`);
// 1. Download file from S3 to a local /tmp folder
const localPath = await this.downloadFile(storageKey);
// 2. Load document with LangChain
const docs = await this.loadDocument(localPath);
// 3. Split document into chunks
const chunks = await this.splitIntoChunks(docs);
// 4. Vectorize and store each chunk
await this.vectorizeAndStore(chunks, { source: storageKey });
// 5. Cleanup the local file
await this.cleanup(localPath);
}
}
Step 4: Loading & Chunking (LangChain)
Inside our worker, we first download the file from S3 to a temporary directory like /tmp.
Then, we leverage LangChain.js to abstract away the complexity of file parsing. LangChain's document loaders (PDFLoader, DocxLoader, TextLoader) can read a file and extract its text content.
import { Document } from '@langchain/core/documents';
import { PDFLoader } from '@langchain/community/document_loaders/fs/pdf';
import { DocxLoader } from '@langchain/community/document_loaders/fs/docx';
import { TextLoader } from 'langchain/document_loaders/fs/text';

// ... inside the worker

// Load PDF/DOC/DOCX/TXT file
let loader: TextLoader | PDFLoader | DocxLoader;
let documents: Document[] = [];

switch (extension) {
  case '.txt':
    loader = new TextLoader(filePath);
    documents = await loader.load();
    break;

  case '.pdf':
    loader = new PDFLoader(filePath);
    documents = await loader.load();
    break;

  case '.docx':
    loader = new DocxLoader(filePath);
    documents = await loader.load();
    break;

  case '.doc':
    loader = new DocxLoader(filePath);
    documents = await loader.load();
    break;

  default:
    throw new Error(`Unsupported file type: ${extension}`);
}

// Add metadata to each document
documents = documents.map((doc, index) => {
  return new Document({
    pageContent: doc.pageContent,
    metadata: {
      ...doc.metadata,
      knowledgeFileId: knowledgeFile.id,
      knowledgeId: knowledgeFile.knowledgeId,
      fileName: knowledgeFile.fileName,
      fileType: knowledgeFile.fileType,
      source: `${knowledgeFile.fileName}#page-${index}`,
      documentIndex: index,
    },
  });
});
Then using LangChain to split the document to smaller manageable chunks:
import { RecursiveCharacterTextSplitter } from 'langchain/text_splitter';

// ... inside the worker

const allChunks: Document[] = [];

for (const doc of documents) {
  const chunks = await splitter.splitDocuments([doc]);

  // Add chunk-specific metadata
  const chunksWithMetadata = chunks.map((chunk, index) => {
    return new Document({
      pageContent: chunk.pageContent,
      metadata: {
        ...chunk.metadata,
        chunkIndex: index,
        source: `${chunk.metadata.fileName}#doc-${chunk.metadata.documentIndex}-chunk-${index}`,
      },
    });
  });

  allChunks.push(
    ...chunksWithMetadata.filter(
      (chunk) => chunk.pageContent.trim().length > 0,
    ),
  );
}
Step 5: Vectorization & Storage (OpenAI & Qdrant)
Now we iterate over the chunks. For each chunk, we make a call to the OpenAI Embeddings API (e.g., text-embedding-3-small) to get its vector representation.
This vector, along with important metadata (like the source document's S3 key and the chunk's position), is then "upserted" into our Qdrant vector database. Qdrant is a high-performance, open-source vector database that's perfect for this kind of application.
import { QdrantVectorStore } from '@langchain/qdrant';
import { OpenAIEmbeddings } from '@langchain/openai';

// ... inside the worker

// Initialize OpenAI embeddings
const embeddings = new OpenAIEmbeddings({
  openAIApiKey: this.configsService.openaiApiKey,
  modelName: this.configsService.vectorModel,
});


// Create vector store instance using fromDocuments
await QdrantVectorStore.fromDocuments(documents, embeddings, {
  url: this.configsService.qdrantDatabaseUrl,
  collectionName,
  collectionConfig: {
    vectors: {
      size: 1536, // OpenAI text-embedding-3-small dimension
      distance: 'Cosine',
    },
  },
});
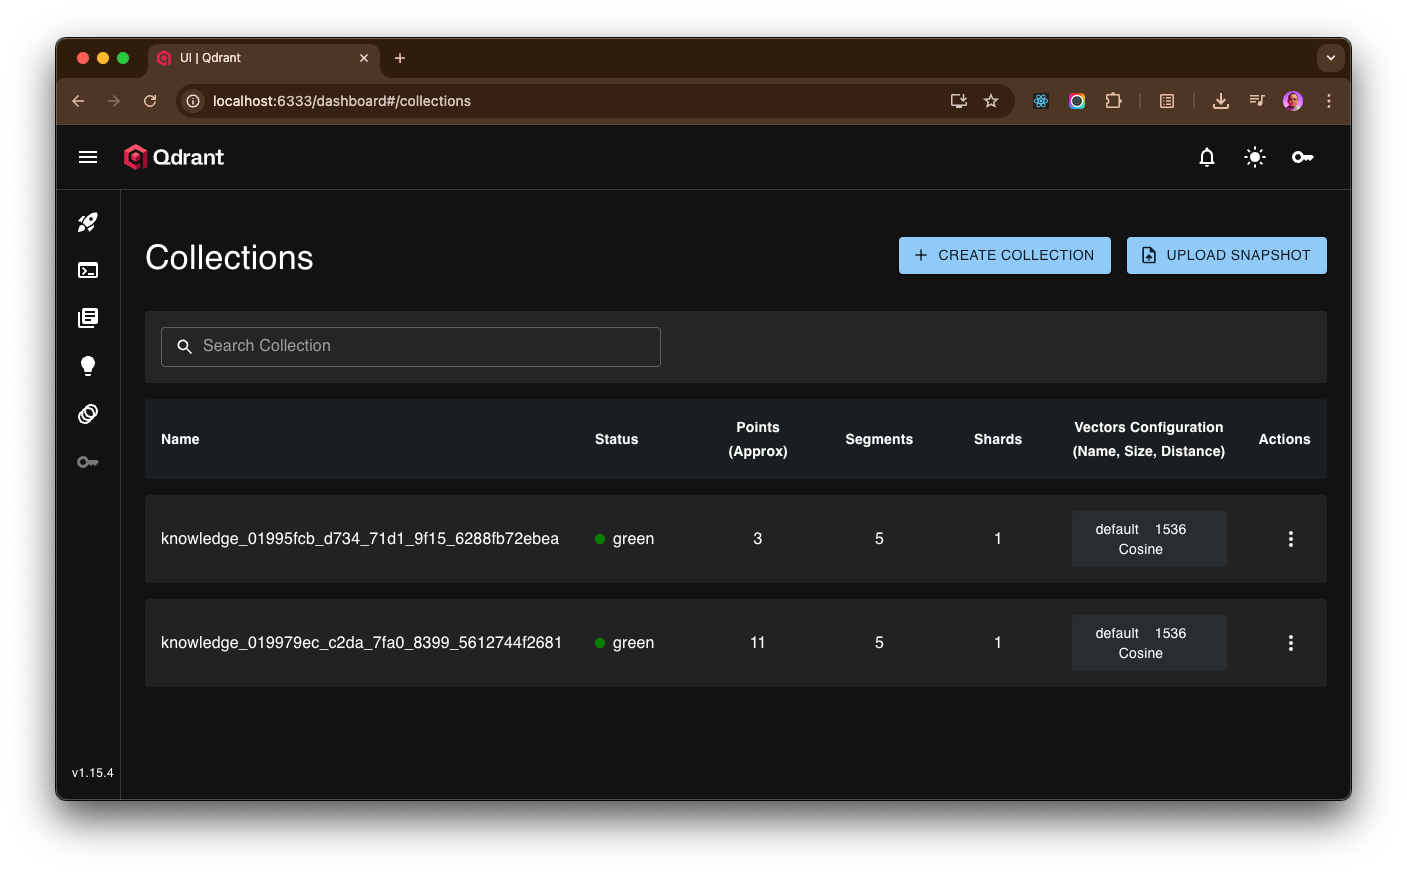
Here screenshot of Qdrant Dashboard run on a local Docker container, contains vector data from OpenAI embedding output:
Strengths of This Architecture
This design isn't just a workaround; it's a robust pattern with clear advantages:
- Durability and Decoupling: The original document is safe in S3, which is designed for 99.999999999% (11 nines) of durability. Our processing workflow is completely decoupled from the file store.
- Resilience and Retries: BullMQ has built-in support for automatic retries with exponential backoff. If the OpenAI API is down for a minute, BullMQ will simply try the job again later without any manual intervention.
- Scalability & Concurrency Control: This is a huge win. You can run multiple worker processes across different machines to process jobs in parallel. Even better, you can configure the BullMQ worker to only process a certain number of jobs concurrently (
concurrencyoption). This allows you to respect the OpenAI API rate limits and avoid overwhelming your vector database, all with a single line of configuration. - Responsiveness: The user's interface is never blocked. They get an immediate "your file is being processed" response, leading to a much better user experience.
Conclusion
Building a production-grade AI LLM RAG application requires more than just a clever prompt. The data ingestion pipeline is the foundation upon which everything else is built. By adopting an asynchronous, queue-based architecture with NestJS, BullMQ, and S3, you create a system that is not only functional but also scalable, resilient, and efficient. It handles failures gracefully, respects external service limits, and provides a snappy experience for your users.
This pattern provides a solid, enterprise-ready blueprint for any application that needs to perform heavy background processing initiated by a user action.
Code Sample
Find an example implementation and code on GitHub:
https://github.com/dojotek/dojotek-ai-chatbot-backend
Code sample to generate S3 presigned URL:
- function create on
knowledge-files.controller.tshere - function create on
knowledge-files.service.tshere s3-storage.adapter.tshere
Code sample of BullMQ consumer (background worker) vectorize-knowledge-file.consumer.ts